
If there is one dish that makes every Indian stop everything they are doing — it is the aroma of Hyderabadi Chicken Biryani being cooked. That intoxicating fragrance of whole spices blooming in hot oil, saffron infused rice layering over marinated chicken, steam rising from a sealed pot — there is nothing quite like it in all of Indian cuisine.
Chicken biryani is the most searched Indian food globally — with an average of 4.56 lakh searches each month. And the most celebrated version of all — the one that every biryani lover considers the gold standard — is Hyderabadi Dum Biryani. India.com
And the oil that creates the most authentic base for this royal dish? Pure wood pressed groundnut oil from Waookytchen — used for frying the golden onions that form the flavour foundation of every great Hyderabadi biryani.
At Waookytchen our wood pressed groundnut oil is cold pressed using the traditional chekku method — preserving its natural nutty flavour, Vitamin E content and heart healthy monounsaturated fats that make it the perfect oil for this royal recipe.
Here is our complete foolproof recipe for the most authentic Hyderabadi Chicken Biryani you will ever make at home.
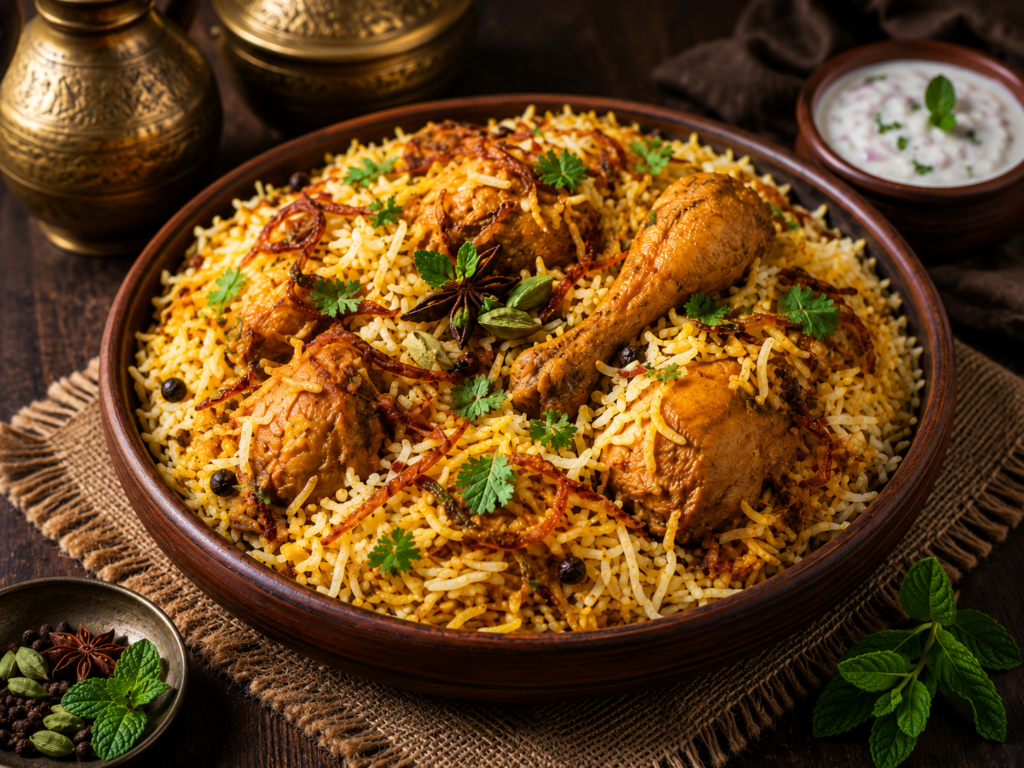
The History of Hyderabadi Biryani
Hyderabadi Biryani was created in the royal kitchens of the Nizam of Hyderabad — the most powerful and wealthiest Indian ruler of the 18th and 19th centuries. The Nizams were legendary patrons of food and culture and their royal kitchens employed hundreds of master chefs called Rakabdars.
The biryani created in these royal kitchens combined the Persian rice cooking traditions brought by the Mughals with the bold spices and flavours of the Deccan plateau — creating a unique style of biryani that is distinctly different from all others.
There are two main styles of Hyderabadi Biryani:
Kachchi Biryani (Raw Biryani) — Raw marinated chicken is layered directly with partially cooked rice and cooked together on dum. This is the most authentic and most celebrated style — requiring more skill but producing extraordinary results.
Pakki Biryani (Cooked Biryani) — Both the chicken curry and rice are cooked separately before being layered and given a final dum. Easier to make and still delicious.
Today we are making Kachchi Hyderabadi Dum Biryani — the authentic original — the one that made Hyderabadi Biryani world famous.
Why Wood Pressed Groundnut Oil Makes the Best Biryani
The fried onions — called Birista in Hyderabadi cooking — are the single most important flavour element of authentic Hyderabadi Biryani. And the oil you fry them in determines their flavour, colour and crispiness.
Our wood pressed groundnut oil is perfect for birista because:
Perfect Frying Oil: High smoke point makes it ideal for the deep frying needed to create perfectly golden crispy birista without burning.
Natural Nutty Flavour: The natural nutty character of cold pressed groundnut oil subtly enhances the caramelised onion flavour — creating a deeper more complex birista than refined oils produce.
Zero Foam: Our pure wood pressed groundnut oil does not foam during frying — making the birista frying process safe and clean.
Heart Healthy: Rich in monounsaturated fatty acids that support heart health — making your biryani healthier than one made with refined oils.
Zero Chemicals: Unlike refined oils extracted with hexane — our wood pressed groundnut oil is pure cold pressed oil — no chemicals ever.
Ingredients
Serves: 4 to 6 people
Marination time: 2 hours minimum — overnight preferred
Preparation time: 30 minutes
Cooking time: 1 hour
Total time: 3 to 4 hours
For the Birista (Fried Onions):
- 4 large onions — sliced very thin
- Wood Pressed Groundnut Oil — for deep frying
For the Chicken Marinade:
- 1 kg chicken — curry cut pieces
- 1 cup thick curd — whisked smooth
- 3 tablespoons birista (fried onions — from above)
- 2 tsp red chilli powder
- 1 tsp Kashmiri red chilli powder — for colour
- 1 tsp coriander powder
- 1 tsp cumin powder
- 1 tsp garam masala
- 1 tsp biryani masala
- ½ tsp turmeric powder
- 1 tablespoon ginger garlic paste
- 2 tablespoons wood pressed groundnut oil
- Salt to taste
- Juice of 1 lemon
- Fresh mint leaves — large handful
- Fresh coriander — large handful
For the Rice:
- 3 cups aged basmati rice — soaked 30 minutes
- Water — for parboiling
- 2 bay leaves
- 4 cloves
- 4 cardamom pods
- 1 cinnamon stick
- 1 star anise
- 1 tsp cumin seeds
- 1 tablespoon salt
- Juice of half lemon
For the Dum Layering:
- A generous pinch of saffron soaked in 3 tablespoons warm milk
- 3 tablespoons pure cow ghee or A2 Gir Cow Ghee
- Remaining birista
- Fresh mint leaves
- Fresh coriander leaves
- Rose water — 1 tablespoon (optional)
- Kewra water — 1 tablespoon (optional)
For Sealing the Pot:
- Atta (whole wheat flour) dough — for sealing the lid
- OR heavy weight placed on lid
Step by Step Recipe
Step 1 — Make the Birista (Golden Fried Onions)
Birista is the soul of Hyderabadi Biryani. Take your time with this step:
- Slice 4 large onions paper thin — as thin as possible
- Separate all the rings
- Spread on a clean cloth for 30 minutes — this removes moisture and helps them fry evenly
- Heat plenty of wood pressed groundnut oil in a deep kadai
- When oil is hot add onion slices in batches — do not overcrowd
- Fry on medium flame stirring occasionally
- As onions turn golden — watch very carefully — they can burn in seconds
- Remove when deep golden — a shade darker than you think is right
- They will continue to darken slightly after removal
- Drain on tissue paper — spread out — do not pile up
- They will crisp up completely as they cool
The birista secret:
- ✅ Paper thin slicing = even frying
- ✅ Drying before frying = faster crisping
- ✅ Medium oil temperature = golden not burnt
- ✅ Remove slightly before perfect = carries over cooking
- ✅ Spread while cooling = crispy not soggy
Make extra birista — it is addictive and disappears fast!
Step 2 — Marinate the Chicken
This is the most important flavour step — do not rush it:
- Take chicken in a large bowl
- Add whisked curd
- Add all spice powders — red chilli, Kashmiri chilli, coriander, cumin, garam masala, biryani masala, turmeric
- Add ginger garlic paste
- Add 3 tablespoons crushed birista
- Add 2 tablespoons wood pressed groundnut oil
- Add lemon juice
- Add fresh mint and coriander — roughly torn
- Add salt
- Mix thoroughly — coat every piece of chicken
- Cover and refrigerate for minimum 2 hours — overnight is best
Why marinating overnight is worth it:
The curd in the marinade tenderises the chicken proteins overnight. The spices penetrate deep into the meat. The acid from curd and lemon breaks down tough muscle fibres. The result is chicken that is incredibly tender, deeply flavoured and falls off the bone.
Step 3 — Parboil the Basmati Rice
Perfect rice is the second pillar of great biryani:
- Wash soaked basmati rice gently until water runs clear
- Boil a very large pot of water — much more water than you think you need
- Add whole spices — bay leaves, cloves, cardamom, cinnamon, star anise, cumin
- Add 1 tablespoon salt and lemon juice
- When water is boiling rapidly add drained rice
- Cook uncovered stirring occasionally
- Check rice after 5 minutes — bite a grain
- Rice should be 70% cooked — still has a slight bite in the centre
- It should be slightly undercooked — it will finish cooking on dum
- Drain immediately in a large colander
- Spread rice on a wide tray to stop cooking
The 70% rule is critical:
If rice is fully cooked when parboiled — it will become mushy during dum. Slightly undercooked rice finishes perfectly during the dum process — absorbing all the flavours from the chicken below.
Step 4 — Layer the Biryani
This is the most satisfying step — creating the beautiful layers:
Prepare the pot:
- Use a heavy bottomed pot — ideally thick aluminium or cast iron
- Add marinated chicken at the bottom — spread evenly
- The raw marinated chicken goes directly into the pot — this is Kachchi method
First layer of rice:
4. Add half the parboiled rice over the chicken
5. Spread gently and evenly
First flavour layer:
6. Drizzle half the saffron milk
7. Add half the remaining birista
8. Add fresh mint leaves generously
9. Add fresh coriander leaves
10. Drizzle 1.5 tablespoons pure cow ghee
Second layer of rice:
11. Add remaining rice on top
12. Spread gently
Final flavour layer:
13. Drizzle remaining saffron milk — creating golden streaks
14. Add remaining birista
15. Add more mint and coriander
16. Drizzle remaining pure cow ghee
17. Add rose water and kewra water if using
Step 5 — Dum Cooking (The Signature Method)
Dum means slow cooking in a sealed vessel — the technique that gives Hyderabadi Biryani its unique character:
Seal the pot:
- Make a rope of atta dough
- Press firmly around the rim of the pot
- Place the lid on top
- Press the lid down firmly — sealing all the way around
- The atta dough creates a perfect seal — trapping all steam and flavour inside
The Dum Process:
- Place the sealed pot on a heavy tawa or flat griddle on the stove
- Cook on HIGH flame for 5 minutes — this creates initial steam
- Reduce to VERY LOW flame
- Cook for 35 to 40 minutes on lowest possible heat
- Do not open the lid during cooking
Alternative Dum Method:
- Preheat oven to 180°C
- Place sealed pot in oven for 35 minutes
- This gives even heat distribution — excellent results
How to know it is done:
- Fragrant steam escapes from around the seal
- The biryani aroma fills your entire home
- After 40 minutes on low flame — rice is fully cooked
Step 6 — Open and Serve
The most satisfying moment:
- Remove from flame
- Wait 10 minutes before opening
- Break the atta seal gently
- Open the lid — the burst of fragrant steam is extraordinary
- Use a flat spatula to gently mix from the bottom up
- Every scoop should have both golden saffron rice and chicken pieces
- Transfer to a large serving dish
Serve immediately with:
- 🥗 Mirchi ka Salan — Hyderabadi chilli curry
- 🥒 Raita — whisked curd with onion and cucumber
- 🥗 Shorba — thin chicken soup
- 🧅 Sliced raw onions with lime
- 🌿 Fresh mint chutney
What Makes Hyderabadi Biryani Different from Other Biryanis
| Feature | Hyderabadi Biryani | Kolkata Biryani | Lucknowi Biryani | Punjabi Biryani |
|---|---|---|---|---|
| Method | Kachchi dum | Pakki | Pakki | Pakki |
| Rice | Long grain basmati | Gobindobhog rice | Long basmati | Basmati |
| Characteristic | Raw chicken + rice cooked together | Potato added | Very mild aromatic | Spicier tomato base |
| Onion | Deep golden birista | Fried onion | Fried onion | Caramelised onion |
| Unique element | Kachchi method — raw chicken | Boiled egg and potato | Subtle saffron | Tomato and yogurt |
| Spice level | Medium high | Mild | Very mild | Medium |
| Frying oil | Wood pressed groundnut oil | Mustard oil | Ghee | Ghee |
Health Benefits of This Recipe
Chicken Benefits:
- High quality complete protein — all essential amino acids
- Rich in B vitamins — especially B12 and niacin
- High in phosphorus — bone health
- Rich in selenium — powerful antioxidant
- Supports muscle building and repair
Basmati Rice Benefits:
- Lower glycemic index than regular rice
- Rich in B vitamins
- Natural source of fibre
- Fragrant compounds — 2-acetyl-1-pyrroline — unique to basmati
Wood Pressed Groundnut Oil Benefits:
- Heart healthy MUFA fats
- Natural Vitamin E — antioxidant protection
- Zero trans fats
- High smoke point — stable at frying temperatures
- Read more: Wood Pressed Oil vs Refined Oil
Pure Cow Ghee Benefits:
- Fat soluble vitamins A D E K2
- Butyric acid — gut health
- CLA — healthy weight support
- Read more: 10 Amazing Benefits of Pure Cow Ghee
Whole Spices Benefits:
- Cardamom — digestive and antimicrobial
- Cinnamon — blood sugar regulation
- Cloves — powerful antioxidant
- Star anise — antimicrobial
- Bay leaves — anti-inflammatory
Pro Tips for Perfect Hyderabadi Biryani Every Time
Tip 1 — Use Aged Basmati Rice
Always use aged basmati rice — minimum 1 year old. Aged rice has lower moisture content and stays separate after cooking. Fresh rice becomes sticky and clumps together.
Tip 2 — Paper Thin Onions for Birista
The thinner the onion slices — the more evenly they fry and the crispier the birista. Use a mandoline slicer if available for perfectly uniform slices.
Tip 3 — Overnight Marination
This is the single biggest upgrade you can make to your biryani. Marinate overnight and the difference in chicken tenderness and flavour depth is extraordinary.
Tip 4 — Heavy Bottomed Pot is Essential
A thin pot will burn the bottom layer during dum. Use the thickest pot you have. Placing the pot on a tawa or griddle adds an extra layer of insulation.
Tip 5 — Do Not Open During Dum
Every time you open the lid you lose steam and cooking stops. Trust the process — keep it sealed for the full 40 minutes.
Tip 6 — Use Pure Cow Ghee for Layering
The pure cow ghee drizzled between layers is what gives Hyderabadi biryani its characteristic richness. For the most extraordinary biryani use our A2 Gir Cow Ghee — made using the Bilona method.
Tip 7 — Real Saffron Only
Use genuine Kashmir saffron soaked in warm milk. Cheap fake saffron gives artificial colour without the distinctive honey-like aroma that defines authentic biryani.
Tip 8 — Rest Before Serving
After dum is complete wait 10 minutes before opening. This allows the steam to distribute evenly throughout the biryani and the rice to absorb the remaining moisture.
Troubleshooting Common Biryani Problems
| Problem | Cause | Fix |
|---|---|---|
| Rice is mushy | Overcooked before dum | Parboil only to 70% |
| Chicken is undercooked | Dum time too short | Ensure 40 minutes on low flame |
| Biryani is dry | Too little moisture in marinade | Add more curd and oil to marinade |
| Bottom is burnt | Flame too high during dum | Use tawa under pot — lowest flame |
| Rice has no colour | Saffron not enough | Use real saffron — more strands |
| Birista is soggy | Not drained properly | Spread on tissue — do not pile |
| Biryani is bland | Under marinated | Marinate overnight — season generously |
Frequently Asked Questions
Q: What is the difference between Kachchi and Pakki Biryani?
In Kachchi biryani raw marinated chicken is cooked together with partially cooked rice during dum — as in our recipe. In Pakki biryani the chicken is cooked into a curry first then layered with rice. Kachchi is more authentic and gives superior results when done correctly.
Q: Can I make vegetarian biryani with this recipe?
Yes — replace chicken with mixed vegetables, paneer or soya chunks. Marinate vegetables in the same curd and spice mixture for 30 minutes. Reduce dum time to 25 minutes.
Q: Why is my biryani not fragrant?
Fragrance comes from quality whole spices, real saffron and genuine wood pressed groundnut oil for birista. Old stale spices give no fragrance. Always use fresh whole spices.
Q: Can I skip the atta dough seal?
You can use a heavy lid with weights on top — or seal with aluminium foil under the lid. But atta dough creates the most complete seal — giving the best dum results.
Q: How many onions do I need for birista?
4 large onions make enough birista for this recipe. Onions reduce dramatically during frying — 4 large onions give approximately 1 cup of birista. Make extra — it keeps well for 3 days.
Q: Can I use mustard oil instead of groundnut oil?
You can but the flavour will be different. Authentic Hyderabadi biryani uses groundnut oil for birista — not mustard oil which is more common in North and East India.
The Complete Hyderabadi Biryani Experience Using Waookytchen Products
Create the complete authentic Hyderabadi biryani experience:
| Component | Waookytchen Product |
|---|---|
| Birista (fried onions) | Wood Pressed Groundnut Oil |
| Chicken marinade | Wood Pressed Groundnut Oil |
| Rice layering | Pure Cow Ghee |
| Premium version | A2 Gir Cow Ghee |
| After meal drink | Honey Lemon Water with Raw Forest Honey |
Every element made pure and authentic with Waookytchen products!
Buy Wood Pressed Groundnut Oil from Waookytchen
The authentic flavour of your Hyderabadi biryani birista depends on the quality of oil you use. At Waookytchen our wood pressed groundnut oil is:
- ✅ Cold pressed using traditional chekku method
- ✅ Natural rich nutty aroma — perfect for birista
- ✅ High smoke point — ideal for deep frying onions
- ✅ Zero hexane or chemical solvents
- ✅ Heart healthy MUFA fats
- ✅ Lab tested every batch for purity
- ✅ Free delivery above ₹499 across India
- ✅ Cash on delivery available
Order Wood Pressed Groundnut Oil from Waookytchen →
Final Thoughts
Hyderabadi Chicken Biryani is not just a recipe — it is a royal legacy. Created in the kitchens of the most powerful rulers in Indian history — perfected over centuries — celebrated worldwide as the pinnacle of Indian rice cooking.
With our complete step by step guide, pure wood pressed groundnut oil for your birista and pure cow ghee for your layers — you can bring this royal tradition into your own kitchen.
Make the birista. Marinate overnight. Parboil the rice. Layer with care. Seal and cook on dum. And experience the most magnificent rice dish ever created.
Order Wood Pressed Groundnut Oil from Waookytchen →
Also Read:
- Crispy Samosa Recipe with Wood Pressed Peanut Oil
- Aloo Pakora Recipe with Wood Pressed Peanut Oil
- Dal Tadka Recipe with Pure Cow Ghee
- Moong Dal Khichdi with Ghee
- Wood Pressed Oil vs Refined Oil — Which is Healthier?
- 10 Amazing Benefits of Pure Cow Ghee
- Is Ghee Good for Weight Loss?
- Raw Forest Honey vs Regular Honey
Leave a Reply